DIY Monday Sharpie Mugs
Learn how to make fast and easy sharpie mugs for daily use.
March 14, 2016
Welcome back to DIY Monday. This week we will be learning how to make creative Sharpie Mugs. First we start off by gathering all of the materials.
- White Mug
- Sharpie Oil Based Paint Markers
- Craft Stickers
- Nail Polish Remover (To help clean up any mistakes)
- Q-tips
- Oven
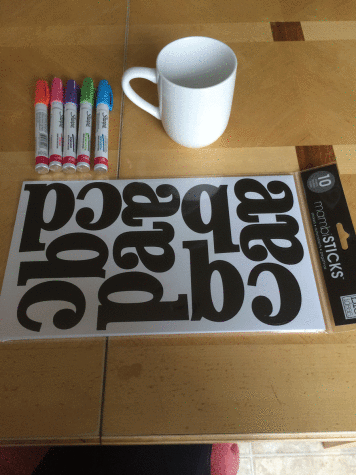
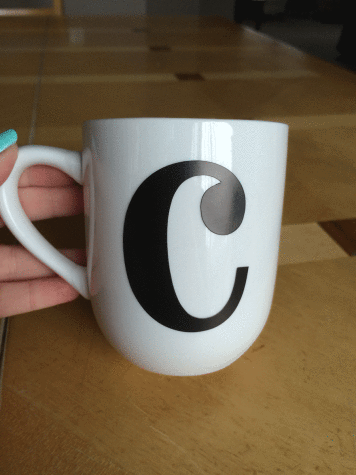
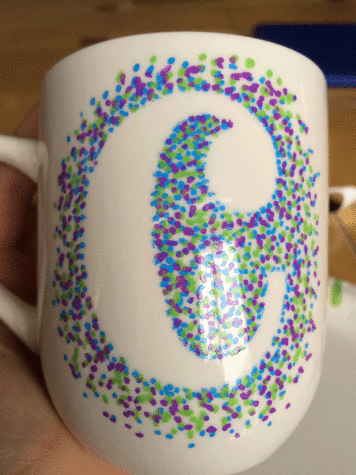
Next take a craft sticker of your choosing and stick it on your mug.
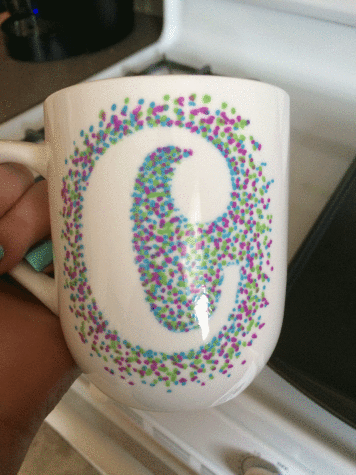
Then take your Sharpie Paint Markers and start placing dots around the letter. Use what ever choice of colors you want, and as many as you want.
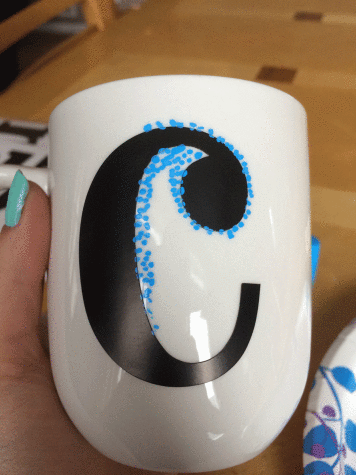
Next let the paint finish drying and then remove the craft sticker. If there are any smugs when removing the sticker use q-tips and nail polish remover to fix any mistakes.
Then preheat your oven to 350 degrees, and let your mugs bake in the oven for 30 minutes.
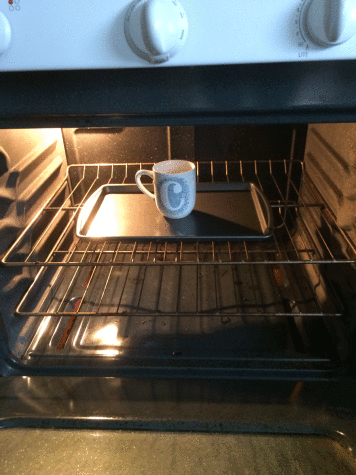
After the 30 minutes turn of your oven, and let your mugs sit and cool.
Finally tada! You have a finished Sharpie Mug.